skip to main |
skip to sidebar

tonight i wanted to whip up something quick and fresh, and i had all of the ingredients on hand to make a quick french meal. i'm not going to say this is authentic, but it will pass. there is a pretty hefty amount of butter, but the dish isn't heavy. don't let the butter sway you against preparing this though, it's worth every calorie.
ingredients:
2 firm white fish fillets (we used red snapper)
flour (for dredging)
4 tablespoons butter
juice of 1.5 big lemons
zest of 1/2 a lemon
about 1 tablespoon of finely minced parsley
one pint baby potatoes (we used white potatoes, but any will do)
8 oz. haricot vert, ends removed
1.5 oz. white truffle butter
1 tablespoon extra virgin olive oil
salt
pepper
directions:
cut the potatoes into 1/2" discs and place them in the basket of a steamer. put the pan over medium high heat, cover, and steam until they are almost done (about 10 minutes).
meanwhile, heat the 4 tablespoons of butter in a large pan (large enough for both fish fillets), and cook until it begins to bubble and turn brown around the edges. salt the fish and then sprinkle it with flour all over. pat off all excess flour and then add to the pan, skin side down (if your fillets have skin).
at this point, add the haricot vert to the steamer with the potatoes and put the lid back on, and continue steaming.
cook the fish until you can see white traveling up the sides. our fillets were quite thick, so this took several minutes, if yours are thinner, it won't take as long. once they are at this point, gently turn them and cook on the other side. your timing for this side should be half the time you had them on the first side (ex. if they were on the first side for 4 minutes, cook them on the second for 2). you don't want to overcook them, so be careful. to check for doneness, just use a fork to flake the fish at the thickest part. if it flakes, it's done. remove to the serving plates and set aside. add the lemon zest, lemon juice, and parsley to the butter that remains in the pan and use a wooden spoon to scrape up any browned bits...let this cook for a minute, then pour over each fillet of fish.
meanwhile, drain the potatoes and the haricot vert and add the olive oil and truffle butter to the pan. put this over a high flame and add the vegetables back in. crack in some fresh black pepper and add salt to taste, and turn the veggies in the butter and oil. remove from the heat and serve with the fish.
notes:
this recipe is a take on sole meuniere. i didnt have sole, and i don't know how authentic it is, but i know my mom makes it really well, and i know she uses these ingredients. i'm fairly certain this sause would taste excellent with shrimp, which would in turn be amazing over pasta. the possibilities are endless.
 well, here i am...back and cooking! bet you thought it would never happen. and frankly, neither did i. i'm in my second trimester, and i have energy again, which is a wonderful feeling after being so tired for so long.
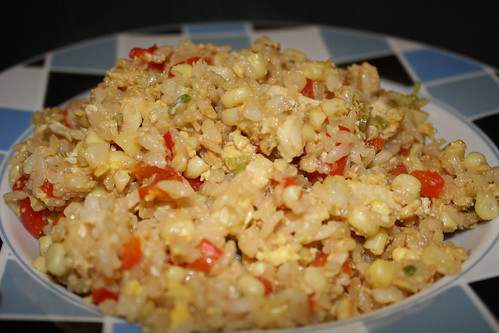
since i've been pregnant i've been more concerned with the food that i've been putting into my body. i want my little bump to have the very best after all! this fried rice is a great light dinner (and would also make a good lunch). it more than served two of us, which is surprising when you see the short list of ingredients below. fried rice is great because you can load it up with your favorite items...these are mine. ingredients:
1 cup rice (uncooked)
1 cup water
3 tablespoons canola oil
1 tablespoon sesame oil
1 tablespoon minced ginger
1 tablespoon minced garlic
1 red bell pepper
2 cobs of corn, kernels removed (see below for tips)
4 scallions
3 large eggs
1 boneless and skinless chicken breast
3 tablespoons soy sauce (tamari if you are preparing it gluten free)
directions:
using a rice cooker (or your preferred method of cooking rice) combine the rice and water and cook.
while that is cooking chop the red bell pepper and the scallions and mince the garlic and ginger, then set these aside. husk the corn, break (or cut) off the stem, and clean off all of the fine threads. hold the corn in your left hand and, starting at the halfway point in the cob, run your sharpest knife down the side to remove the kernels. then flip the cob over and remove the kernels on the other end. set the corn aside with the other vegetables.
clean and "de-fat" your chicken breast (that's what we call it in our household anyway) and then cut it into small pieces. you want it to distribute through the fried rice, so the pieces should be pretty small. set aside.
in a small bowl, whisk the three eggs together. set aside.
ok, now that all of your prep work is done you are ready to fry the rice! in a large pan heat the canola and sesame oil over medium high heat. add the vegetables and stir through until the bell pepper begins to soften. add the chicken and stir until it is cooked through. make a "well" in the middle of your pan by pushing all of the ingredients to the sides, and then pour the eggs into the center. cook these as you would scrambled eggs (e.g., keep moving them around with a spoon or spatula) and once they are completely cooked, mix everything together.
your rice should be done at this point, so add it to the pan and increase the heat in the pan to high. mix the rice through with the vegetable, chicken, and egg mixture and then add the soy (or tamari) sauce. the heat from the pan will remove any extra liquid and make the rice nice and fluffy. once everything is incorporated, it's ready to serve. enjoy!
notes: this is so easy, and like i said, can use any ingredients. this is just what we had on hand. make good use of your local farmers market to get the freshest ingredients you can, and this will be a delicious meal in your house too. oh, i don't know this for sure, but i'm 99% certain that if you have little ones, they will love this too.
i don't have a photo for this recipe, but don't let that prevent you from giving it a try. this is a fast, easy mid-week dinner, and the fact that it falls into our "weekly vegetarian meal" makes it even better.
don't think for a moment though that the vegetarian label means it's not full of flavor. the banana peppers and feta cheese keep it tangy. serve this alongside a simple salad of mixed greens with your favorite low fat dressing for a healthy weeknight meal.
ingredients:
3 - 4 garlic cloves, minced
3 tablespoons olive oil
1 4 oz package of baby spinach leaves
1 8.5 oz can artichoke hearts (packed in water), roughly chopped
2 tablespoons banana peppers, roughly chopped
1 4 oz feta cheese, crumbled
12 eggs
red pepper flakes to taste (optional)
directions:
preheat the oven to 350.
heat the olive oil over medium high heat in a large oven-proof non-stick pan, add the garlic and saute until fragrant (about a minute). add in the spinach a handful at a time until it is all incorporated. stir with a spoon until all is wilted. add in the roughly chopped artichoke hearts and banana peppers and heat through.
meanwhile whisk all twelve eggs together in a large bowl. redistribute all of the items in the pan so that they are evenly distributed. pour the eggs over the top of the filling items and then top with the crumbled feta cheese. sprinkle red pepper flakes over the top (if you'd like a bit more spice).
cook on the stove until the bottom is set. you may need to pull up the edges of the frittata and tilt the pan so that the eggs can run under to the bottom. once the bottom is set, pop into the oven and cook until the top is set (about 10 minutes). enjoy!
notes:
easy, vegetarian, and gluten free! what more could a girl ask for? this is great for dinner, a lunch, or even breakfast. change the items you serve on the side to suit the meal you choose to serve.
 wow, it's been a while since i've posted. sorry for the radio silence. there really isn't an excuse, but the holidays and work were busy, and the blog just got away from me. i'll be better...promise.
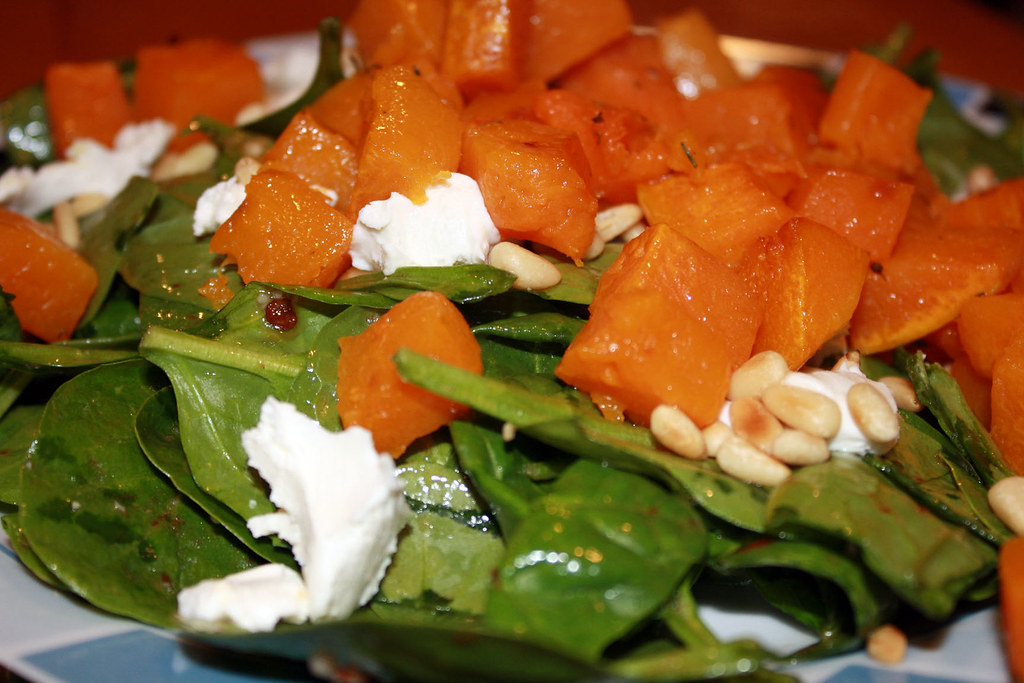
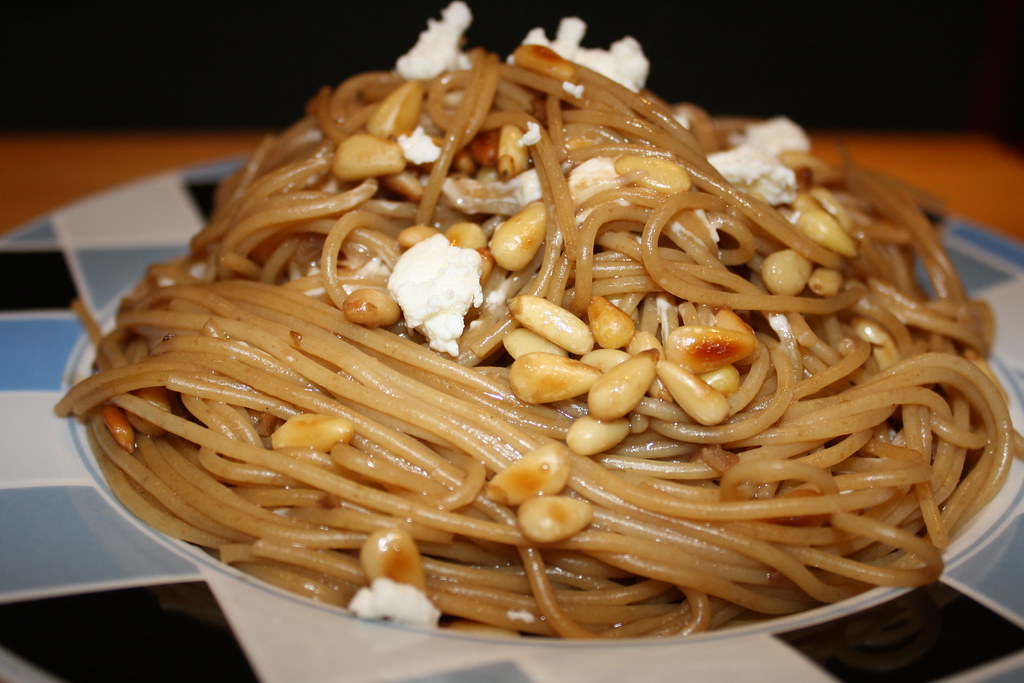
that said, i'd like to present you with a recipe for a wonderful little salad. easy to make, and very hearty. it's full of all of the delicious flavors of fall and winter and will leave you and your loved ones feeling satisfied despite the fact that it is vegetarian and, well, a salad.
ingredients:
one large package of baby spinach leaves, washed (yes, again)
1 large butternut squash, peeled, cored, and cut into 1" cubes
4 ounces of pine nuts
3 ounces of goat cheese
1 chipotle in adobe (see notes for storing the rest of the can), chopped
1 clove of garlic, minced fine
3 tablespoons of white wine vinegar
4 tablespoons of extra virgin olive oil, plus more for butternut
salt and pepper to taste
directions:
line a baking sheet with a silpat or parchment and preheat the oven to 350.
peel, core, and cut up the butternut into 1" cubes. toss with some olive oil and salt and pepper to taste and transfer to the baking sheet. bake for 20 minutes (or until the butternut is soft, but not yet browned). remove from the oven and set aside.
toast the pine nuts in a small pan over medium high heat until they begin to brown and they smell deeply nutty. set aside.
wash the spinach and add to a large bowl.
i use the mini food processor attachment for my immersion blender to make the dressing, and it works like a charm. if you don't have one of these, you can do it the old fashioned way by mincing the chipolte very fine, mincing the garlic very fine and adding these, along with the vinegar to a small bowl. very slowly stream in the olive oil and whisk while you do. eventually everything will all come together, and this is called an emulsion. in a food processor, just add all of the ingredients and whizz. either way, add salt and pepper to taste.
toss the spinach leaves in the dressing and then plate. top each plate with crumbled goat cheese, the toasted pine nuts, and a generous amount of the roasted butternut squash. enjoy!
notes:
to store the remaining chipotles, put them into a ziploc baggie and press all of the air out. then pop this into the freezer...when you need more, they will be there.
this salad is spicy and sweet, and very good for you. it serves two as a main course and four as a starter or side dish.
 some nights the last thing i want to do is come home and cook. it doesn't happen often, but when it does it hits me like a ton of bricks. however, with this recipe on hand i'm never stuck with nothing to eat. the ingredients are readily available, inexpensive, and the preparation could not be faster.
enjoy these fresh healthy tacos when you are running short on time but want something long on flavor.
ingredients:
4 fresh tilapia filets
8 crunchy corn taco shells*
1/2 a head of napa cabbage, shredded
queso fresco or cheddar cheese (optional)
1/2 cup low fat sour cream
1 chipotle chile in adobo, minced fine
goya adobo seasoning
olive oil
directions:
heat olive oil (about 1 to 2 tablespoons) in a large pan over medium high heat. cut fish into chunks about 1 inch in size. add them to the pan and sprinkle with the adobo seasoning mix (use this to taste, it's not spicy hot, just spicy flavorful). saute until cooked through, about 3 to 4 minutes, and then remove.
shred the cabbage and set aside. in a small bowl mix the minced chipotle chile and the sour cream to make a spicy sour cream.
spread the sour cream on the inside of the taco shells, and then add fish to the bottom, then napa cabbage, and sprinkle cheese (if using) on top. serve warm with a slice of lime (to sqeeze on at the last second) and enjoy!notes:
* we used the Safeway brand taco shells which were labeled as gluten free. please be sure to check the ingredients on your favorite brand to make sure they are safe if you are preparing this gluten-free.
 this dish is so quintessentially Italian, and it is an excellent source of protein and it is gluten-free (unless you add something wheaty to it). these flavors just “go” together, and when i saw broccoli rabe in the store i knew i would be adding it to something for dinner this week.
ingredients:
1 bunch broccoli rabe, cleaned and ends trimmed, then chopped
3 links or one “roll” pork sausage (i used smithfield mild pork sausage roll as it is gluten-free)
1 block (about ½ a pound) of fontina cheese, cubed
8 eggs
salt and pepper
olive oil
directions:
heat olive oil in a large non stick pan over high heat. add the sausage, breaking it up with the back of your spoon so that it browns evenly. once it is fully browned, add the chopped broccoli rabe and let that wilt down until it’s a dark green and is soft.
preheat the oven to 400 degrees.
mix the eggs, salt and pepper (to taste), and the cubed fontina in a small bowl. pour this over the sausage and broccoli rabe mixture and make sure to evenly distribute the eggs. let this set on the bottom (run a rubber spatula under this to make sure you will easily be able to cut and remove slices of the finished frittata) and then pop it into the oven for about 8 to 10 minutes, or until the top of the frittata is set. let cool for about 4 to 5 minutes and then turn out and slice into wedges to serve.
notes:
this could be a great meal for breakfast or dinner. if you are serving for breakfast a nice side of fresh berries would be a good compliment. for dinner a green salad would be delicious.
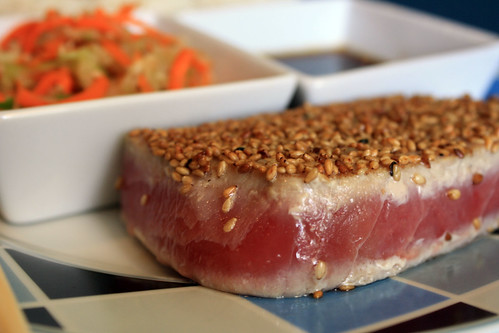 tuna is my favorite fish. i love it when it’s seared like this…warm and crusted on the outside and pink and cool in the center. i also love it in tuna sandwiches, and tuna poached in white wine with anise and tarragon. really tuna is a versatile fish, and this dish shows just how simple it is to prepare.
ingredients:
2 ahi tuna steaks
good sea salt
3 tablespoons toasted sesame seeds
olive oil
directions:
heat olive oil over very high heat in a non stick pan. salt both sides of the tuna. on a small plate lay out the sesame seeds and press one side of the tuna into them to form a crust. use your fingers to make sure they are adhered to the tuna. repeat with the other tuna steak.
once the pan is very hot, lay the tuna in sesame seed side down, and sear for one minute. flip and sear the second side for 30 seconds. remove from heat immediately and set onto a cool plate.
notes:
make a dipping sauce by mixing 3 tablespoons of wheat-free soy sauce, 3 tablespoons of water, and 2 tablespoons of honey in a small bowl. serve with the ginger scented rice and quick picked veggies.
 when i was young there was a restaurant near me called viet chalet. they served the most amazing vietnamese food, and frankly, i was addicted. i’d grown accustomed to the perfect spring rolls, and to vietnamese coffee (i loved watching it filter and the sticky sweet taste of the condensed milk). most of all i was addicted to one dish in particular, hanoi beef. it was a simple dish of beef that had been marinated and skewered and grilled, and it was served with delicate rice noodles, vegetables, herbs, and the consummate vietnamese fish dipping sauce nuoc cham. i ate it at least once a week, and it got to the point where they stopped asking me what i wanted when i came in, they just started cooking it for me.
when the restaurant closed my mother and i set out on a mission to find a suitable replacement for my vietnamese food fix, which is how we discovered the taste of saigon an amazing restaurant located in rockville. though they don’t have hanoi beef on their menu, my favorite was replaced by mama tu’s pepper shrimp, a secret recipe that i long to recreate. in the mean time, i’ve been trying to master the hanoi beef, and i think i finally got it.
ingredients:
1 pound skirt steak, silver skin and copious fat removed
3 serrano peppers, seeded, ribs removed, and sliced
1 stalk of lemongrass, outer leaves removed, then minced
2 tablespoons fish sauce
juice of three limes (with pulp)
2 tablespoons of sugar
2 tablespoons cilantro, cleaned, stemmed, and chopped
1 english cucumber, peeled, seeds removed, and cut into matchsticks
3 carrots, peeled, and cut into matchsticks
¼ cup mint, cleaned and minced
¼ cup cilantro, cleaned and minced
¼ cup basil, cleaned and minced
vietnamese fish dipping sauce, recipe here
rice noodles, cooked per the package instructions.
directions:
mix the peppers, lemongrass, fish sauce, limes, sugar, and cilantro in a bowl. thinly slice the steak on the diagonal (it helps if you refrigerate or slightly freeze it before you slice so that you can get the pieces thinner). add the steak and the contents of the bowl to a ziploc bad and marinate in the refrigerator for at least two hours.
if you are cooking on a grill you can skewer the beef onto metal skewers (or bamboo skewers that have soaked in water while the beef marinates) and then grill them until browned. this will not take long. if you are cooking indoors, you can just add the beef to a very hot pan or wok and turn until the beef is browned, again, this won’t take long.
cook the rice noodles per the package instructions, and serve the beef with the carrots, cucumbers, and rice noodles along with the blend of three herbs. dip into the vietnamese nuc cham dipping sauce and enjoy!
 in balitmore we have the benefit of a very good local bison farm, gunpowder bison & trading company. bison is an excellent protein. delicious, and lower in fat than beef. the bison at gunpowder is raised hormone free, which means it's even better for you. they deliver, so check out their website!
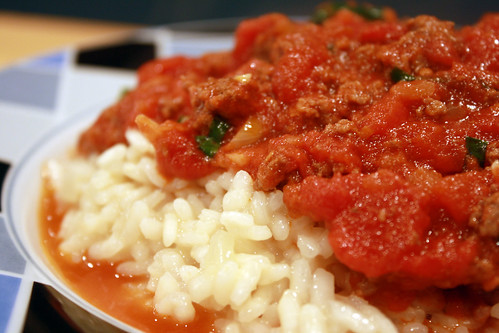
this is my standard ragu starter, with bison thrown in. i find that it's easier (and cheaper) to make sauce from scratch at home, then to read through the long lists of ingredients on the backs of the jars in the grocery store aisles. plus, my sauce tastes better.
you could eat this over pasta, but why not give risotto a try...it's a better pairing than you think...
ingredients:
1/2 large onion, finely diced
2 large bunches of basil, leaves sliced and stems chopped
salt
olive oil
4 cloves of garlic, very thinly sliced
2 cans san marzano tomatoes (28 oz. each)
1 pound ground bison
1.5 cups arborio rice
4 cups chicken stock - Pacific brand is gluten-free
1/2 cup white wine
2 tablespoons butter
2 tablespoons olive oil
1 medium onion, finely chopped
1 cup finely grated parmesan cheese (use a microplane if you have one)
directions:
to prep: finely dice your onion, chop your basil stems and slice your basil leaves, and very thinly slice your garlic.
add olive oil (about 2 tablespoons) to a large pan and saute the onion, basil stems, and garlic over medium heat until soft. add the bison and saute until browned. if you'd like you can drain off some of he fat, but bison tends to be less fatty than beef. add the tomatoes (be sure to pick through these with your fingers and pull out any skins and any of the basil they pack them with) and their juices and break them up with the back of a wooden spoon. simmer while you are prepping the risotto.
in a small pot heat the stock over low heat. you just need to keep it warm throughout the cooking process.
in a large pan, melt the butter and olive oil over medium heat (it's better if this is lower than you think it should be...so if you are unsure, turn the heat down) add the onion and some salt and sweat the onions until they are glassy. add the rice and stir until it smells nutty, then add the wine. stir until the liquid is incorporated, and then add 1/2 cup of the stock. stir and let the liquid plump the rice. continue adding the stock, 1/2 cup at a time, until all but 1/2 cup is incorporated. (be sure to stir the rice regularly, and don't let it get too dry...the more you stir it, the more the starches will break down, which is what makes that beautifully creamy sauce.) once there is 1/2 cup of stock remaining, add in the cheese, stir, and then the last 1/2 cup of the stock. turn off the heat and let the residual heat help the rice absorb the remaining stock.
serve the bison ragu over the risotto and prepare to be swept away to a wonderful land where your tastebuds dance and bask in the sun.
notes:
as a recent gluten-free eater, risotto has become a staple in our household. i find that it tastes good alone, and also with heaping gobs of sauce. this would be good with any red sauce, and the red sauce could be made with beef, chicken, turkey, or even lamb or veal. look for whatever is fresh and local to you.
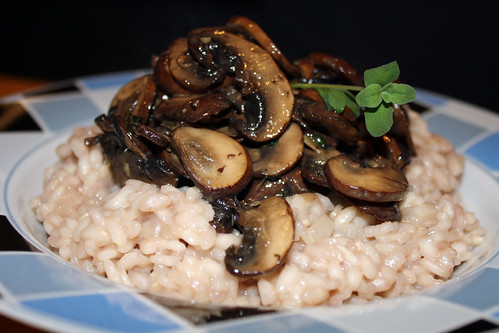 everything about this title sounds delicious. i love marsala wine, especially sweet marsala, and often use it even though a recipe calls for dry. it immediately imparts a flavor that would take hours of careful reducing and tweaking to otherwise come up with. risotto, as you have probably guessed by now, is a staple in our house...and since it's gluten-free, it's being eaten even more often! mushrooms are being slowly introduced around these parts because my husband was never too fond of them. they are growing on him, however, so you will likely notice them showing up more and more.
i have posted several recipes for risotto, and i swear each is my favorite, but then i create another and i fall in love all over again. this is an excellent vegetarian option, you don't even notice that there is no meat in the dish because it's so hearty. i used red wine to make this beacuse...well, that's what i had open. it tasted great, but it does color the rice slightly (as you can see in the photo). if you prefer a more pure visual experience, go with white wine. also, in full disclosure, i used chicken stock to make this, but veggie stock is just as good (though, it too will color the rice slightly).
ingredients for the risotto:
1.5 cups arborio rice
4 cups stock (veggie or chicken) - Pacific brand is gluten-free
1/2 cup wine (red or white)
2 tablespoons butter
2 tablespoons olive oil
1 medium onion, finely chopped
1 cup finely grated parmesan cheese (use a microplane if you have one)
salt
ingredients for the mushrooms:
1 package of cremini mushrooms, cleaned and sliced
4 sprigs of thyme, leaves picked and stems discarded
2 tablespoons butter
1 tablespoon olive oil
splash (maybe 1/4 cup) of sweet marsala wine
salt
pepper
directions:
in a small pot heat the stock over low heat. you just need to keep it warm throughout the cooking process.
in a large pan, melt the butter and olive oil over medium heat (it's better if this is lower than you think it should be...so if you are unsure, turn the heat down) add the onion and some salt and sweat the onions until they are glassy. add the rice and stir until it smells nutty, then add the wine. stir until the liquid is incorporated, and then add 1/2 cup of the stock. stir and let the liquid plump the rice. continue adding the stock, 1/2 cup at a time, until all but 1/2 cup is incorporated. (be sure to stir the rice regularly, and don't let it get too dry...the more you stir it, the more the starches will break down, which is what makes that beautifully creamy sauce.) once there is 1/2 cup of stock remaining, add in the cheese, stir, and then the last 1/2 cup of the stock. turn off the heat and let the residual heat help the rice absorb the remaining stock.
while the risotto is cooking...
heat the butter and oil (measurements for the mushrooms) in a small pan and once melted add the mushrooms and a pinch of salt and the leaves of thyme. stir until the mushrooms start to go soft and absorb some of the butter and oil and then add in the marsala. stir through until some of the liquid is reduced/absorbed by the mushrooms.
top the risotto with the mushroom mixture. enjoy!
notes:
the thyme and mushrooms go really well together, but if you'd like to add a different herb some of these would work: sage, parsley, rosemary, or a herbes de provence blend.
 i know, it sounds weird. but honestly, tomato sauce (or marinara) with tuna in it is so delicious, and is pretty common in italy. it's important to get the tuna packed in olive oil, as it imparts a nice flavor to the sauce. the tuna also adds protein to the sauce, making this a more substantial meal. this quick marinara is one i rely heavily upon for weeknight meals, and it's never failed me.
serve this over whole wheat spaghetti for a simple weeknight dinner, and prepare to be wowed at how good tuna and tomato sauce really is!
ingredients:
1/2 large onion, finely diced
2 large bunches of basil, leaves sliced and stems chopped
salt
olive oil
4 cloves of garlic, very thinly sliced
2 cans san marzano tomatoes (28 oz. each)
2 cans tuna in olive oil (6 oz. each)
1 tsp za'atar powder
directions:
to prep: finely dice your onion, chop your basil stems and slice your basil leaves, and very thinly slice your garlic.
add olive oil (about 2 tablespoons) to a large pan and saute the onion, basil stems, and garlic over medium heat until soft. add the tomatoes (be sure to pick through these with your fingers and pull out any skins and any of the basil they pack them with) and their juices and break them up with the back of a wooden spoon. add the za'atar powder and them simmer for about ten minutes. drain the tuna and add it to the tomato sauce, being careful to leave some large chunks intact. turn off the heat, and add in the basil leaves, taste and season if needed. serve over pasta and enjoy!
notes:
pasta...you really can't go wrong with pasta, especially when it's being served with a sauce this good. most people really enjoy a nice homemade tomato sauce which takes like 15 minutes start to finish, so why use jarred sauces? the tuna is really what sets this apart though...even the kids will love it.
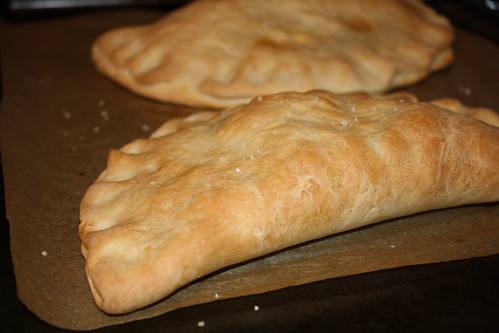 when we were in pittsburgh for memorial day my friend nikki made pizzas for us for dinner one night. one version - my favorite - was a greek pizza, and it was awesome. i've decided to recreate those, but as calzones, and then share the recipe with you.
ingredients:
1 cup of marinated artichoke hearts, roughly chopped
1/2 cup of black olives, sliced
banana peppers sliced (to taste)
4 oz. tomato paste
1 teaspoon za'atar powder
practical gourmet pizza crust recipe (i used unbleached white flour for these calzones, but wheat is fine too)
4 oz. feta cheese, crumbled
2 oz. mozzarella cheese (optional)
directions:
prepare the pizza crust per the instructions, but before putting it in the bowl to rise, evenly separate it into 4 balls. preheat oven to 425, and allow dough to rise for abvout 15 minutes on top of the oven (the heat will force it some).
meanwhile, chop the artichoke hearts and slice the olives. mix the tomato paste and za'atar powder together in a small bowl, and then crumble the feta into another small bowl.
once the dough is risen, flatten the four balls out into four discs and place them onto parchment paper. smear (such a good word to use in cooking!) half of the discs with the tomato mixture, and then top with 1/4 of the artichokes and olives and add banana peppers to taste. top with 1/4 of the feta and a little mozzarella (this just make it "cheesy" since the feta won't melt.) fold over the top half of the disc and pinch the top edge and bottom edge with your fingers. srpinkle with salt and repeat 3 more times.
pop into the oven and bake for 15 minutes (rotate the pans halfway through if you are baking all four of them on two racks). enjoy!
notes:
this calzone is tangy and salty and delicious. i mixed some additional za'atar powder into some extra virgin olive oil and dipped my crust into it. vj dipped his into tomato sauce.
 wow, long time no post. which is weird, because i've had lots of foodie things going on lately. i have several recipes lined up for you...and i'll post them all over the next week or so, so just hang tight.
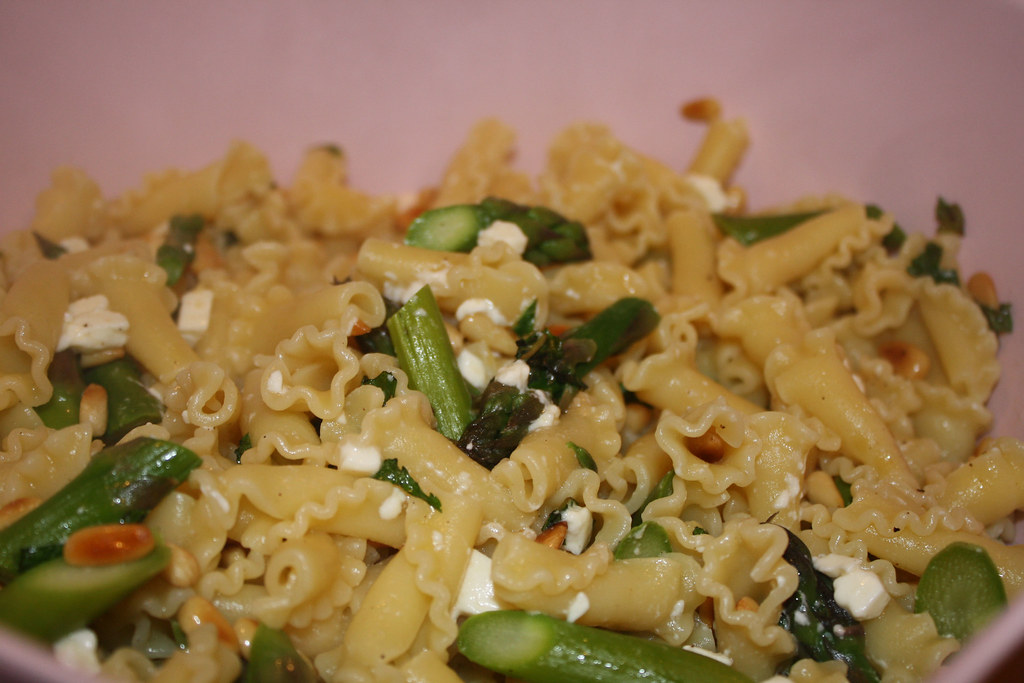
the recipe for today is a seasonal treat. 100% vegetarian (but not vegan, sorry margaux) but very filling and delicious as a main course. it's a simple dish, and took only about 15 minutes to prepare...wow, the news just keeps getting better and better!
give it a go, even my carnivorous husband thought it was a showstopper!
ingredients:
1 pound campanelle pasta (or penne or rotini)
1 bunch asparagus, cleaned and cut into 2" lengths
1/2 a block of feta (or 4 oz.) crumbled or cubed
1 package of pine nuts (or 4 oz.)
about 2 tablespoons fresh chopped mint
2 cloves of garlic confit (or roasted garlic)
2 tablespoons of garlic infused olive oil
salt and pepper to taste
directions:
bring a large pot of salted water to a boil, and add pasta. cook pasta for 6 minutes, and then add the asparagus to the water and cook both for an additional 4 minutes. drain and add to the bowl with the ingredients below.
while the pasta and asparagus are cooking...
toast the pine nuts in a dry pan over high heat. be sure to flip these around (use a spoon if you aren't comfortable with your pan flipping technique) so that they don't burn. once they are a nice golden brown and smell all deliciously nutty they are perfect, remove from the heat and add to a large bowl. chop the mint and place it in the bowl with the pine nuts. crumble the feta and add this to the bowl as well. mash the garlic confit (or roasted garlic) in the olive oil and add salt and pepper to taste and then pour this into the bowl as well. when the pasta and asparagus are done, add them to the bowl and toss to combine. serve warm and enjoy!
notes:
this is a really nutritious dish, and it's really tasty too. i served mine alongside some large scallops that i brushed with a combination of cayenne pepper, honey, and butter and then seared over a very high heat. the mint and cool feta were a perfect compliment...but like i said, it would be great on its own (which is how i intend to eat the leftovers tomorrow for lunch!)
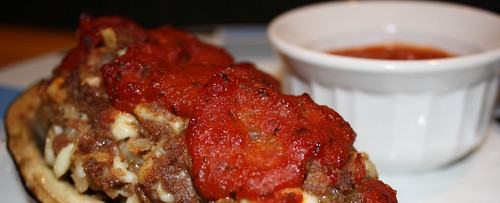 we love eggplant around our house. we both grew up on it, and love it in italian and asian recipes alike. however, some people aren't as comfortable with eggplant...and this is a good recipe to try if that is the case because eggplant isn't the starring role, but a supporting player to the juicy beefy mixture in the center. give it a try and i'm sure you'll be a convert!ingredients:
2 medium eggplants
1 pound ground beef
1 medium onion, finely diced
4 cloves garlic, thinly sliced
1 tablespoon fresh rosemary, finely minced
1 tablespoon fresh sage, finely minced
1 tablespoon fresh thyme, finely minced
1 egg
1 cup breadcrumbs
1 cup shredded mozzarella cheese
salt and pepper
olive oil
marinara sauce
parmesan cheese
directions:
in a large pan, heat about 3 tablespoons of olive oil over medium high heat, and add the onions and garlic. stir through until they are soft and glassy. meanwhile, mince the sage, rosemary, and thyme and add to the pan with the onions and garlic. once done, remove from the heat and set aside.
in a large bowl mix the beef, onion mixture, egg, mozzarella cheese, and breadcrumbs gently, being careful not to overwork, but being sure to incorporate everything well. set aside.
preheat the oven to 375 degrees.
wash the skin of the eggplants well. then, slice the eggplants in half lengthwise - and using a paring knife and a large spoon - scoop out the flesh inside leaving a "wall" of eggplant to hold the beef mixture. salt the insides of the eggplant, and place them onto a baking sheet. fill them with the beef mixture, being sure to keep it "loose" and not over pack it. top with a few tablespoons of marinara sauce, and pop into the oven for 45 minutes. top with feshly grated parmesan cheese, and serve hot. enjoy!
notes:
this is tasty and filling. it could be made with ground turkey breast if you are concerned about fat and calories, and i think it would taste just as good. this is essentially my meatball mix, and i will probably do a meatball sub recipe in the next few weeks...because this got the hubby asking for it!
 when my husband was in law school we spent the majority of our time together on the weekends and almost always stayed home. our time together during the week was interrupted by my job and his studies, so we concentrated our weekends into just "us" time. we often cooked together, mainly breakfast, and one year his sister bought us a sweet little cookbook called a taste for love: a romantic cookbook for two. it was chock full of romantic meal ideas which ranged from inexpensive roasted chickens to elaborate lobster dinners.
we fell in love with one dish in particular and made it a lot the first few years of our marriage. it was called angel hair pasta with braised garlic, and it was divine. in this dish i've attempted (successfully, i believe) to recreate the sauce. i've added a few additional flavors to break up the slightly cloying flavor of the reduced sauce, and i believe they set it off perfectly. cook this for your loved one and you are sure to have a romantic night in.
ingredients:
12 cloves of garlic, finely chopped
1/4 cup of balsamic vinegar
3/4 cup of light brown sugar, packed
1 cup of chicken stock
1 tablespoon olive oil
1 pound angel hair pasta
5 ounces goat cheese
1/2 a package (or about 1/2 cup) of pine nuts
directions:
bring a large pot of salted water to a boil.
toast the pine nuts in a large pan over high heat. be sure to toss them frequenly and keep an eye on them, they burn quickly. remove from the pan once they have a nice golden color and you can smell them.
heat the olive oil in the same pan over medium high heat. saute the garlic for a few moments - 45 seconds tops - and then add the balsamic vinegar and brown sugar. mix these two together to form a viscous liquid, and then gently stir in the chicken stock (it will take a while to combine). reduce the heat to medium and let this simmer until it is reduced by half and significantly thicker, stirring occasionally.
when the sauce is close to being thick enough, cook the pasta and then drain it and add it back to the pot. add in the pine nuts, and then about half the sauce and stir. crumble in half of the goat cheese and stir again. plate the pasta and then top with more crumbled goat cheese and drizzle on more sauce. enjoy!
notes:
simple and delicious, this dish is a crowd pleaser. you can add in roasted vegetables or even sliced or shredded chicken, these flavors pair well with anything.
 lately i've been trying to prepare vegetarian dishes at least once a week. not because we are thinking of going veg, but because the health benefits are undeniable. it's fun to come up with vegetarian recipes that are unique and aren't boring...it feels like they've all been done before, you know? i'm not sure this is an original, but it's certainly tasty, and couldn't be simpler. it makes for an elegant preparation, so it would be well suited to a dinner party if you are hosting vegetarians. ingredients:
1 onion, chopped
1 pint mushrooms, cleaned and chopped (i used cremini)
half a butternut squash, chopped into 1" cubes
3 carrots, chopped into 1" cubes
2 large (or 3 medium) parsnips, chopped into 1" cubes
2 yukon gold potatoes, chopped into 1" cubes
olive oil salt and pepper
thyme (on the stalk)
6 puff pastry rounds
half a log (or one ball) of goat cheese
directions: preheat the oven to 425 degrees. place all of the chopped vegetables onto a baking sheet and lightly coat with olive oil, salt and pepper to taste, and then top with several (6 or 7) stalks of thyme. the leaves will fall off of the stalks in the oven, so you don't need to remove them unless you really want to. 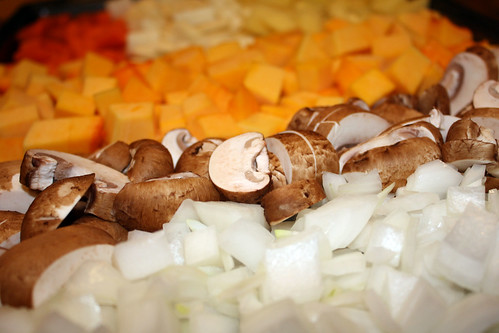 on a second baking sheet, lay out the puff pastry rounds, pop these and the veggies into the oven and cook for about 15 minutes, and then turn the veggies with a spatula. you may need to remove the puff pastry at this point, but follow the package instructions for that. continue cooking the veggies for 10 to 15 more minutes, or until soft, and just beginnning to brown. to assemble, cut the pastry in half (or peel apart the layers) and place goat cheese on the inside of the bottom piece, then top with veggies, and then another layer of goat cheese, and then put on the pastry "lid". you can add more veggies to the plate to supplement. enjoy!notes: there is nothing more seasonal than roasted root vegetables in the winter. they are wholesome, delicious, and enjoyed by all. they pair particularly well with the goat cheese, and who doesn't love puff pastry!?
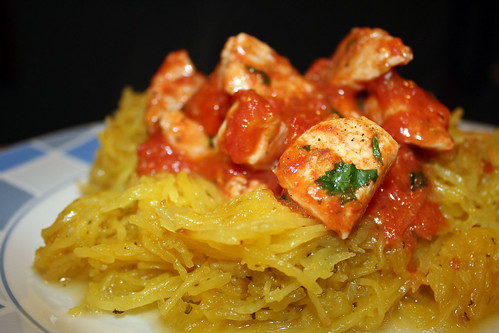 i love squash. all kinds of squash, butternut especially, but also spaghetti. it's an under-utilized vegetable, and that's a shame because it's really quite fun to cook with. i love how it comes to you all whole and packaged up perfectly, and with minimal effort, it turns into perfect strands of vegetable goodness.
fun with food!
this dish features za'atar powder, which is a commonly used herb and spice blend from the middle east. it usually contains thyme, oregano, and marjoram with toasted sesame seeds and often sumac. it's a nice blend, and though it has an exotic name, will taste very familiar and comforting.
ingredients:
1 spaghetti squash
2 tablespoons za'atar powder
olive oil
salt and pepper
2 boneless skinless chicken breasts
1 pint cherry tomatoes
small handful of fresh parsley, chopped
directions:
preheat oven to 375 degrees.
cut the spaghetti squash in half lengthwise and scoop out the seeds. smear the inside of the squash with olive oil and then coat with za'atar powder and salt. turn cut side down onto a baking sheet and then pop into the oven for 30 to 35 minutes.
cut the cherry tomatoes in half. heat olive oil in a large frying pan over medium high heat. add tomatoes and let them break down slightly, about 5 minutes. meanwhile, cube the chicken and then add it to the pan with some salt and pepper to taste. then add a sprinkling of za'atar powder and cook, stirring occasionally until the chicken is cooked through. mix in parsley and then remove from heat and set aside.
once the squash is cooked through (pierce with a knife to make sure it's soft), use a fork to remove the individual strands from the skin, discard the skin. mix around the squash to make sure the spices are mixed through and then add to a plate. top with the chicken and tomato mixture and enjoy!notes: this is so good. spicy (not hot spicy, but flavorful spicy) and totally good for you. low in fat, and no simple carbohydrates...wonderful.
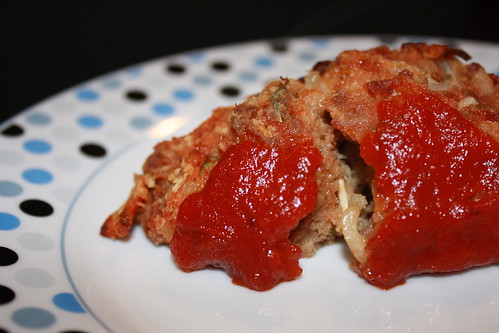 there is no way to make the title of this post sound fancier, because meatloaf in and of itself isn't a fancy dish. it is comforting and delicious though, and that's what i was aiming for.
most recipes for meatloaf call for either ketchup or tomato sauce, but this version (my mother's) calls for heinz chili sauce, which is what gives it the zesty flavor that i love. it also helps keep the meatloaf moist, which i think is very important, as some meatloaf tends to be, well, dry. the other unique ingredient in this is lipton soup mix, which adds flavor and little bits of veg, which is nice.
all in all, i think this recipe is both easy and a show-stopper (but then i wouldn't put it up here if it weren't)!
ingredients:
1# ground beef
2 eggs
2 cups panko bread crumbs
1 packet lipton vegetable soup mix (not with the noodles)
1 large onion, finely chopped
1 bottle heinz chili sauce
salt and pepper
olive oil
 directions:
preheat the oven to 350 degrees.
heat about 2 tablespoons of olive oil over medium heat and add the finely chopped onions. sprinkle with salt (to speed up the sweating process) and cook until they are glassy, stirring occasionally. remove from heat.
mix the eggs, 1/2 of the bottle of chili sauce, veggie soup mix, and salt and pepper to taste in a large bowl. add the beef and the onions and then one cup of panko. mix together gently with the tips of your fingers, adding more panko as needed until the mixture holds together nicely.
spray a casserole dish with non-stick spray (or olive oil if you have a misto like i do) and then form the beef mixture into a loaf shape (keep it kind of low and flatten it out some - you want a lot of room on the top for later). pop into the oven for 30 minutes. remove from the oven and spread the remaining chili sauce on the top of the meatloaf with the back of a spoon. cook for 15 minutes more, remove, cool slightly (if you can stand it) and serve. enjoy!
notes:
i guess every family has a recipe for meatlof (i find myself saying that about almost everything i cook) but i think this is an good variation if you are up for something different. i've never substituted turkey for this, but i suppose you could. if you do, i would recommend not cooking the onions beforehand, and would grate them instead of chopping them.
when i applied for foodbuzz's january 24, 24, 24 i never thought i would be selected. however, there must have been something about my proposal that piqued their interest because i am one of this months 24 bloggers.
i've had three main culinary influences in my life; my mother, her father, and my father's mother. all taught me very different things about food, and how to prepare it. the most important thing that they each instilled in me is a love of food and of cooking. my childhood memories are peppered with days spent with my hands in bowls of meatloaf or stirring pots of simmering sauce. my favorite chores were gathering vegetables from my grandmother's garden and shucking corn. you might say i was a strange child.
however, the memory of my childhood has stuck with me, and i think of those chores, and of stirring those pots, and of forming meatloaf with my hands whenever i'm in the kitchen. my mother, my grandmother, and my grandfather have instilled in my an innate sense of what food should taste like, and have drilled into me the steps that go into making it.
with that in mind, my entry to the january 24, 24, 24, is called "southern comfort", a sampling of the foods i grew up loving, prepared the way i remember them, with one of my favorite people by my side - my mother. on the menu is my family recipe for fried chicken, quick collard greens, fried okra, macaroni and cheese with lump crab meat, and my grandmother's recipe for 'spotted pup' - a traditional southern approach to rice pudding.
________________
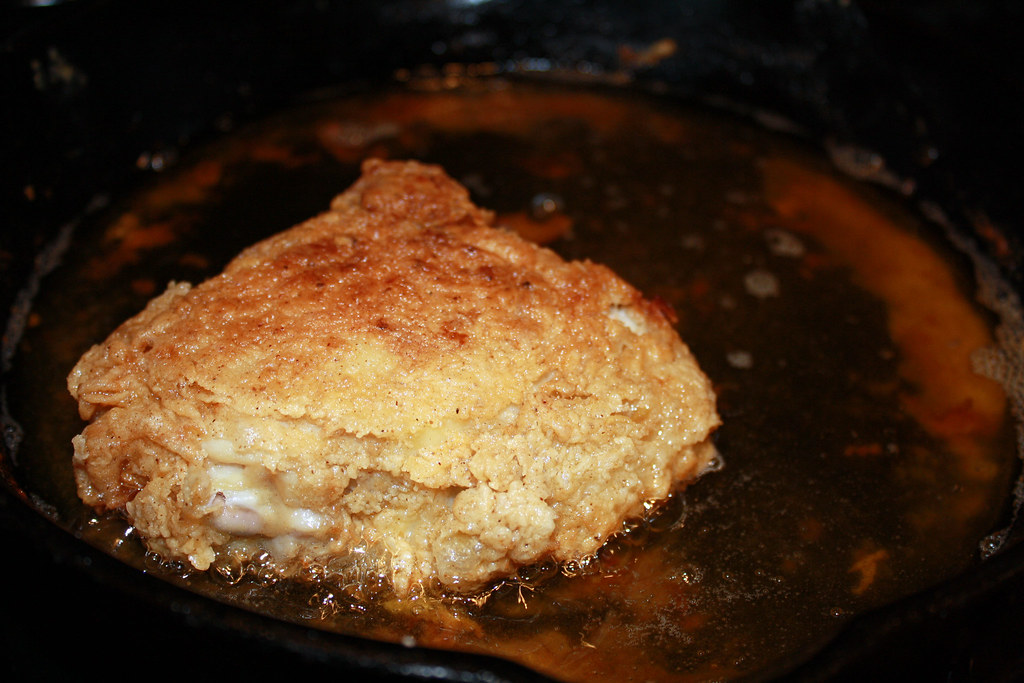
 southern fried chicken
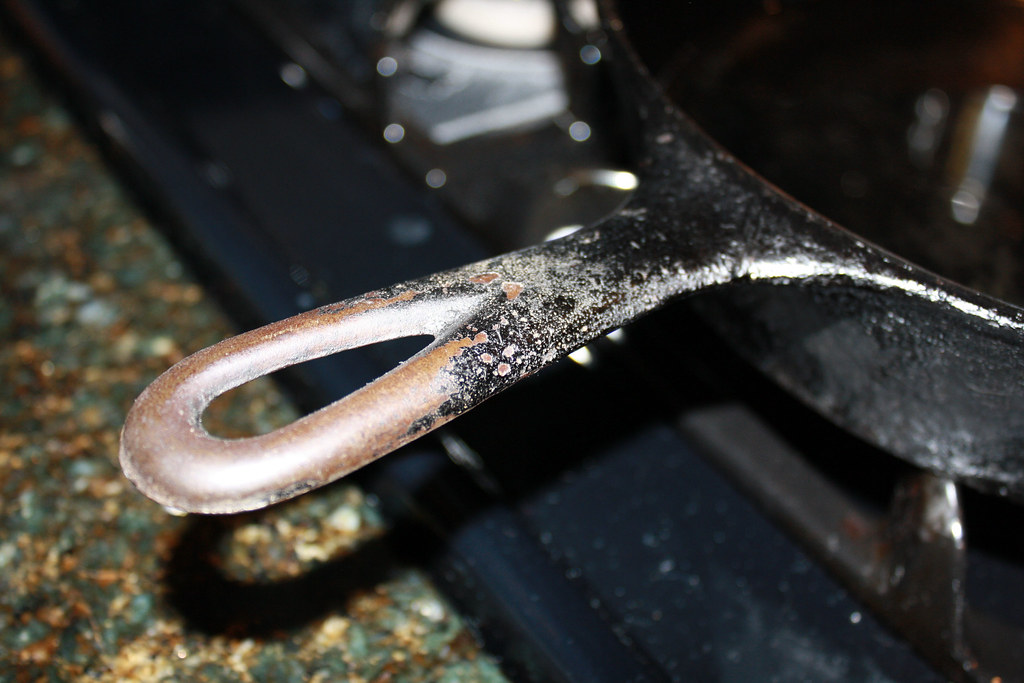
this recipe is simple and actually pretty quick. there are a lot of spices in the flour, which is what gives the crispy crust it's trademark flavor. i always use my mother's cast iron skillet to cook my fried chicken (anything fried actually) and if you have one, you should do the same. if not, another large, flat-bottomed skilled will do a fair job. we use canola oil to fry, though traditionally this would have been made with crisco. as a rule, we brine our chicken before frying it. it keeps the meat moist, and gives it lots of flavor that seeps into the skin and crust when cooking.
ingredients for brine:
1 cup salt
2 cups warm water
directions for brine:
dissolve the salt into the water and then transfer to plastic bag and add chicken. brine overnight in a container in the refrigerator to prevent leakage.
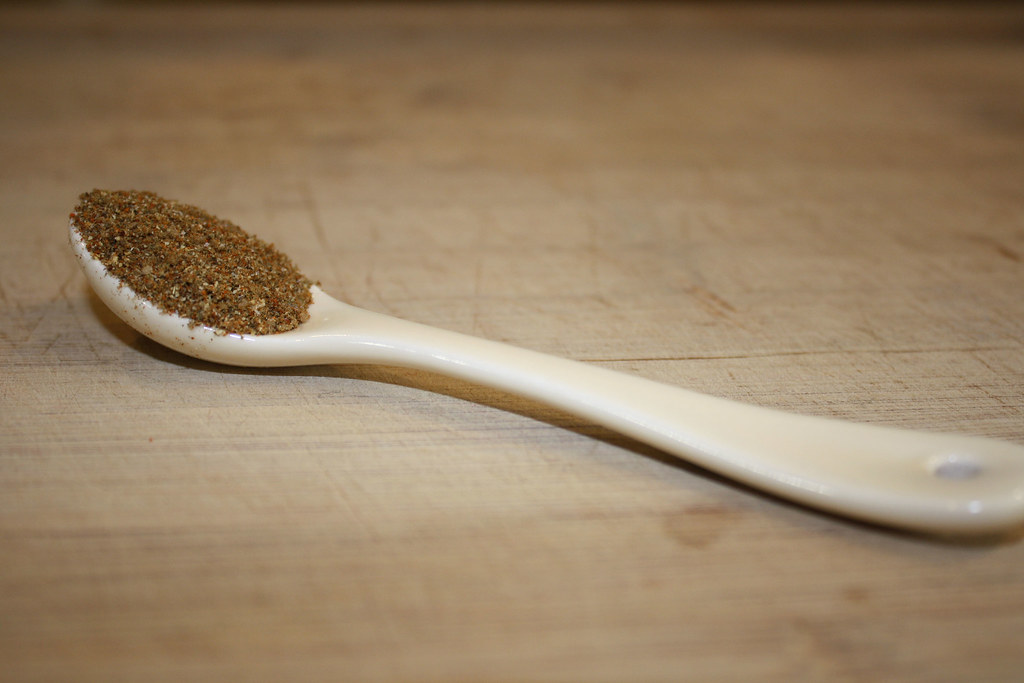 ingredients for the spice mixture:
2 teaspoons fleur de sel (or other sea salt)
3 teaspoons poultry seasoning
1 teaspoon garlic powder
1 teaspoon paprika
1 teaspoon cayenne pepper
3/4 teaspoon black pepper
directions for the dredging flour:
mix all of the above spices together in a shallow bowl, and then mix into 2 cups of all purpose flour. set aside.
ingredients for frying:
8 pieces of chicken (we used thighs, but you can use your favorite cut)
canola oil
1 cup buttermilk, in a shallow bowl
directions for frying:
remove the chicken from the refrigerator at least one hour prior to frying. rinse chicken clean of brine, and dry very well with paper towels. set aside on a plate and cover with plastic wrap to keep out curious house cats.
preheat oven to 350 degrees. heat one half to three quarters of an inch of canola oil in your cast iron skillet, or another large heavy skillet. the oil should get very hot, you will know it's ready when a ball made of buttermilk and flour drops into the oil and floats to the top with bubbles all around it.
 dredge the first four pieces of chicken in the flour mixture, and then knock off any excess flour (it should be a very light coating), then dredge in the buttermilk, and then back into the flour. this coating should be heavier, and you don't need to knock any excess off. place four pieces of chicken into the pan at the same time. cook for 10 minutes on the first side, flip, and cook 10 minutes more. remove to paper towels and repeat for the second batch.
once both batches are cooked, pop them into the oven for 15 minutes. then remove and serve.
notes:
simple, comforting, and delicious. this fried chicken is packed with spicy flavors, and is sure to be a hit if you try it in your home. also, you could use the same ingredients and method to make fried chicken strips for children.
________________
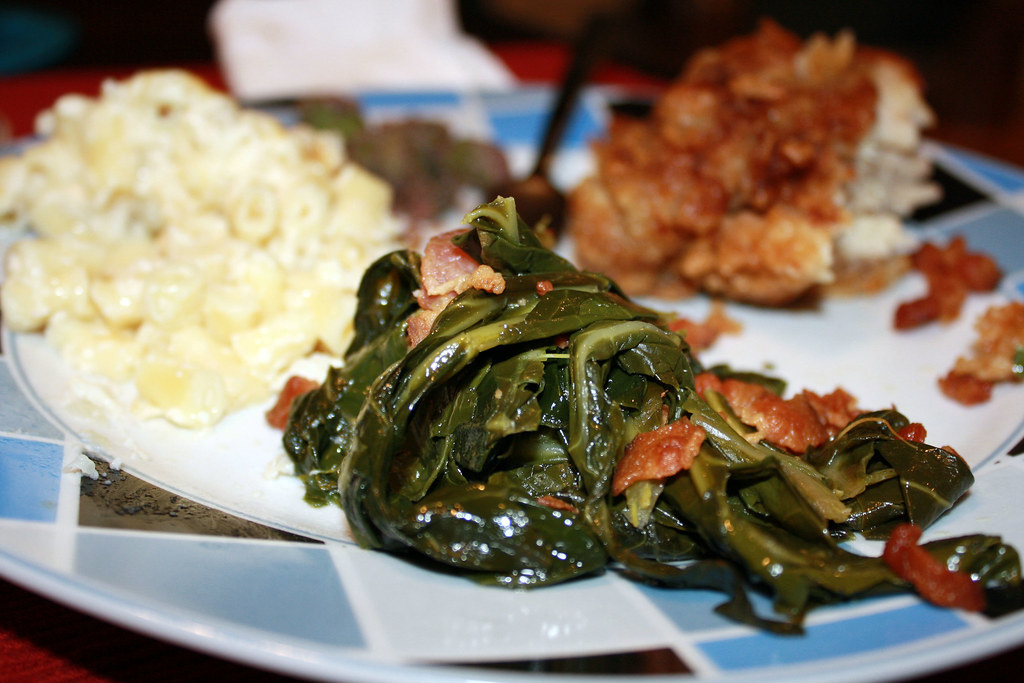
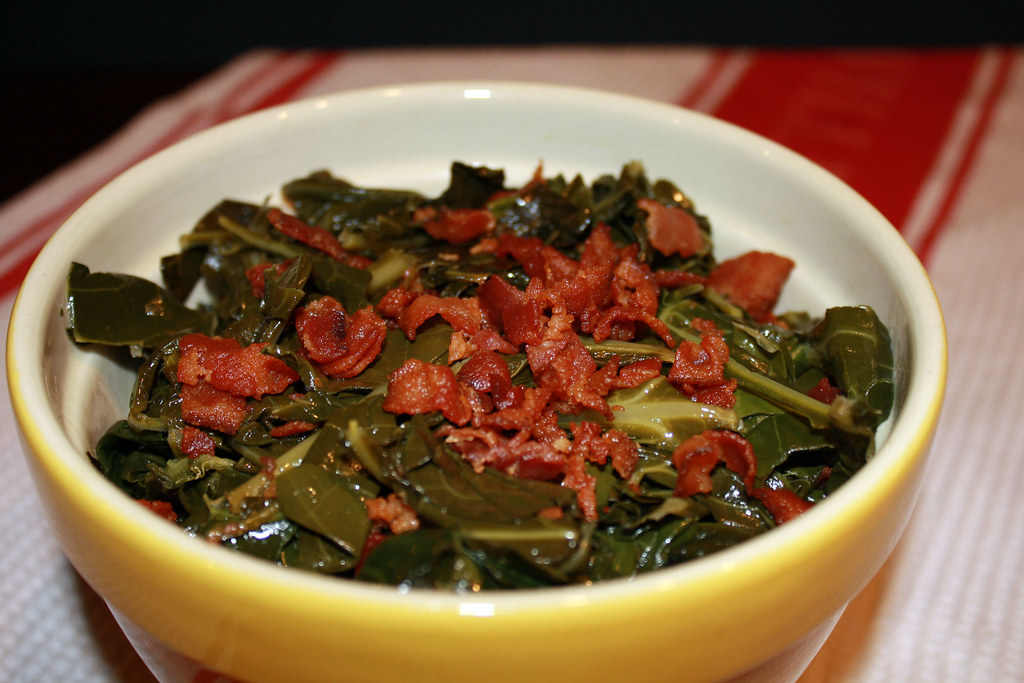 quick collard greens
next up is the quick solution to a southern classic; collard greens. i learned how to make both versions when i was young. the traditional method, though delicious, takes all day to make. these are fast enough for a weeknight, and still retain the smoky flavor and slight bitterness associated with collards.
ingredients:
one half pound bacon, chopped
3 bunches of kale
salt and pepper
directions:
in a frying pan over medium-high heat, render down the pre-chopped bacon until crispy. remove bacon from pan, and set aside the bacon grease.
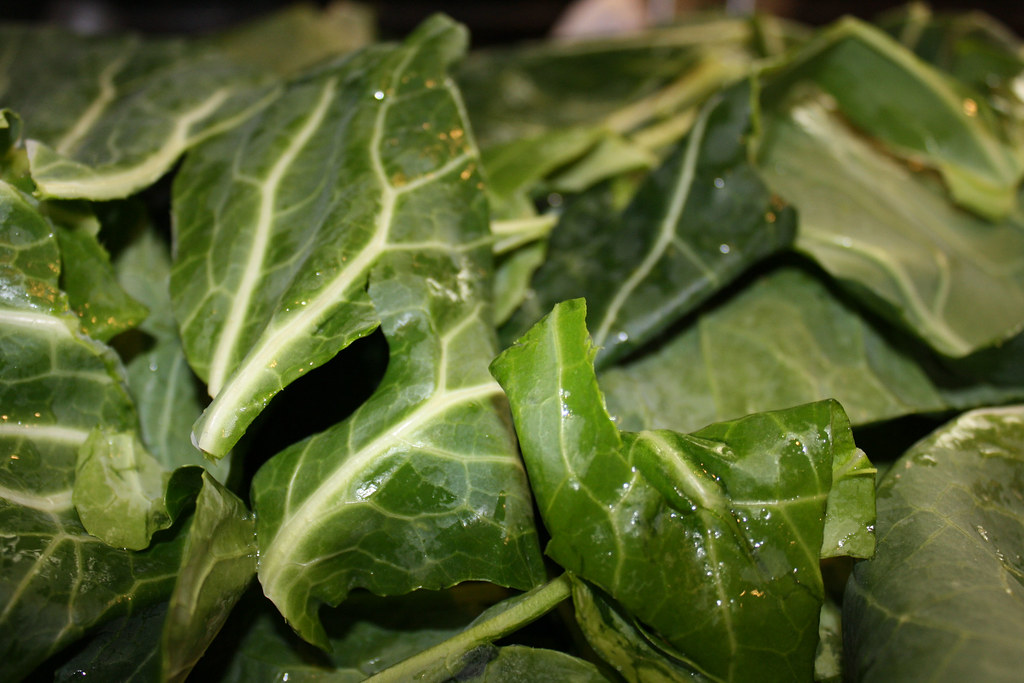 carefully wash your greens in the sink, and remove the stems from them as you go. rip them into large pieces and set aside. fill a large pot with about 2 inches of water and add all of the greens, cover with the lid. set this on the stove over medium-high heat and give it about 15 minutes to steam. check often. the greens will wilt down and turn dark green. this process removes most of the bitterness. once the greens are wilted, drain them off and replace large pot over medium-high heat. add the bacon grease, and the greens, salt and pepper to taste and sautée for about 5 minutes until the leaves are well coated in the grease. don't let them brown.
right before serving, toss in the bacon.
notes:
this adaptation is really simple and though not good for your body, good for your soul. you could use less bacon and bacon grease here, but really, it's what gives the greens their trademark flavor.
________________
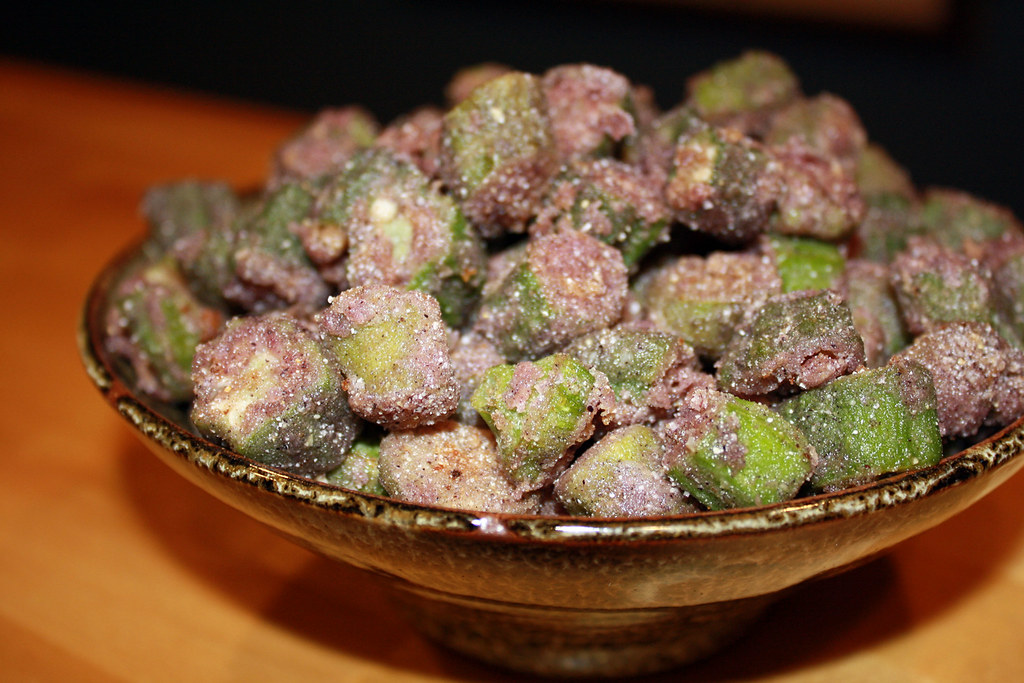 fried okra
next up on the list is fried okra. this is another southern classic, and one i remember more fondly than any of the others from my childhood. my grandmother made this all the time when i was growing up, and i was often called in to remove the slimy snotty stuff that appeared whenever the okra was cut into. i never minded though, because i knew these were at the end of all of the hard work. we used to pop these into our mouths like popcorn, sprinkled with salt, and even a little pepper, these evoke some of my happiest childhood memories.
ingredients:
1 bag frozen okra, thawed at room temperature
1 and one half cups of blue corn meal (you can use yellow if you have that already)
salt and pepper to taste
canola oil
directions:
either use the oil left over from the fried chicken (it will have a little more flavor than if you start over with new oil) or fill a cast iron skillet (or another heavy skillet - a wok would work too) with about half an inch of canola oil. heat over high heat, and check to see if it's the same way as for the fried chicken. you can also use a bit of bread to check this if you don't have the okra prepared yet.
to get the okra ready, add the corn meal, salt and pepper to taste (more than you think you need) to a ziploc bag. move around with your fingers to make sure it's all incorporated, and then add in the okra. toss around to make sure each piece is well coated in the corn meal.
 when the oil is ready, add the okra and move around a little to make sure all sides are being hit by the oil. keep in the oil until browned, and then remove to paper towel. you will likely have to do this in batches. as soon as you remove the okra, sprinkle it with more salt (and pepper if you'd like, or even cayenne) and then let it cool slightly.
notes:
with four ingredients, this recipe is really simple. even if you've never tried okra before, you should give this recipe a go. and, the best part is that the frozen and thawed okra takes care of the annoying slimy snotty stuff for you. it's a misunderstood vegetable, and one that is at its very best in this classic southern preparation.
________________
 macaroni and cheese with crab meat
macaroni and cheese is a classic southern dish. it's served all over the south, and there are as many recipes for it as there are stars in the sky. my own family has one that dates back well into the 1940's, and it's my go-to recipe whenever i need to prepare a batch of this creamy and cheesy dish.
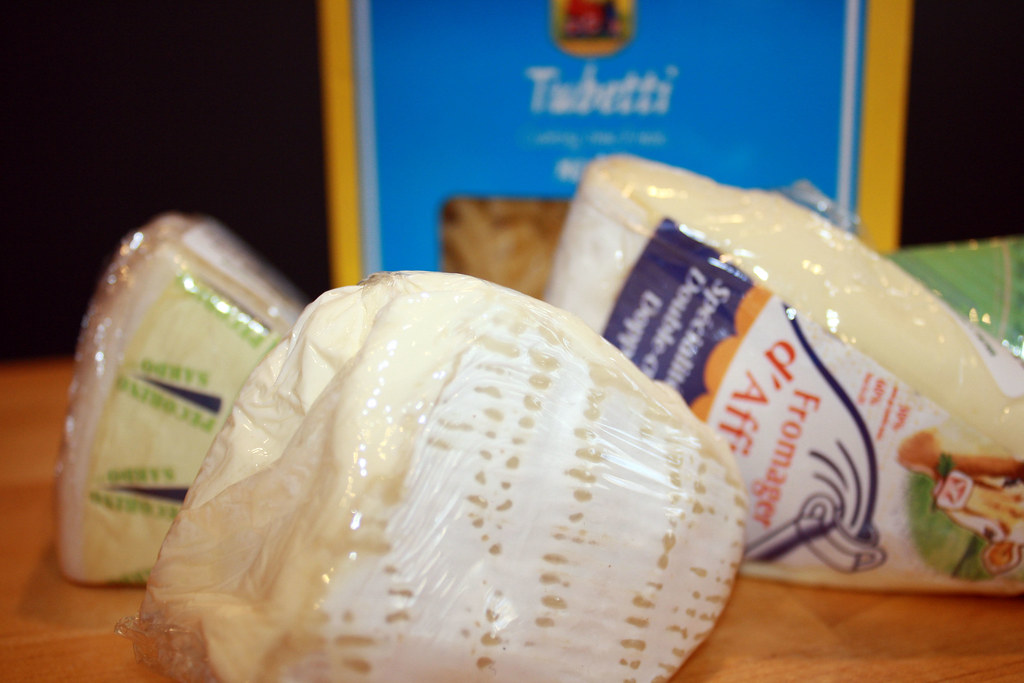
 however, i knew for this that i needed to impart a little of the north into the traditional southern approach to this dish. i hope you will forgive me my decision when you taste this dish. it is, without a doubt, the best macaroni and cheese i've ever had...and i've had a lot. the crab is there, and can be tasted, but it's not overwhelming. the cheeses i chose are a perfect compliment to the delicate shellfish, and melt so well you won't believe your eyes. also, instead of the traditional elbow macaroni, i've chosen to use a slightly more updated tubetti shape. it's fun, but still evokes the more expected shape.
this is the most laborious component i cooked the whole day. it takes a while to make good mac and cheese from scratch, but it's well worth it.
ingredients:
6 tablespoons plus one teaspoon of butter, divided
2 large (or 3 medium) shallots, minced
1 clove of garlic, minced
3 tablespoons of flour
4 to 5 cups of whole milk
salt
1# pasta (i used tubetti, but you could use elbow or another shape)
cayenne pepper
6 oz. crab (either good canned or fresh from the fishmonger)
1 wedge brillat-savarin cheese at room temperature
1 wedge good french brie at room temperature
2 wedges st. teresa peccorino sardo at room temperature
 directions:
put a large pot of water on to boil, and add several heavy pinches of salt. once it boils, add the pasta and under cook slightly (make sure there are no hard bits, but don't let it get as soft as you would if you were going to eat it with sauce). drain and set aside.
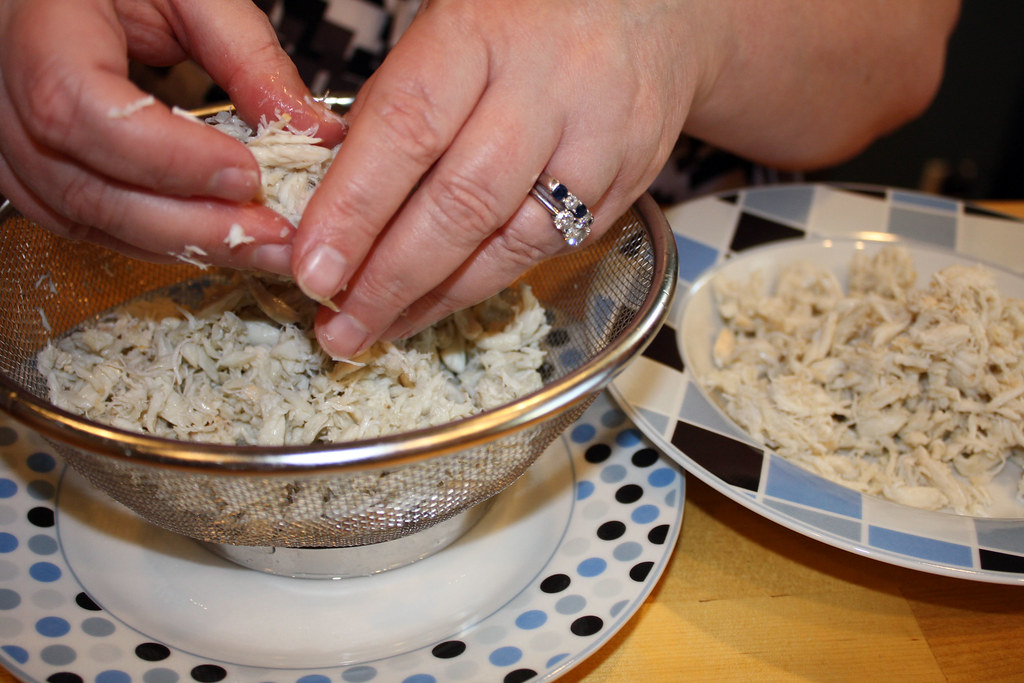
pick through the crab meat with your fingers, removing any shells or hard pieces and discarding them.
 in another large pot melt two tablespoons of the butter over medium low heat. add in the minced shallots and garlic and sprinkle with salt. slowly sweat them until they are glassy and very soft. this could take up to 10 minutes, but don't rush it. it's important that these don't brown, so keep the heat low and be patient. once they are done, add in 4 tablespoons of butter and the flour. mix well with a fork or whisk until incorporated and cook for about a minute more to remove the raw flour flavor. add in the milk (start with 4 cups, and slowly add up to 5 if you need to thin the mixture out) and whisk to remove any lumps of the flour and butter mixture. slowly break in the brie and brillat-savarin cheeses, and sprinkle in some cayenne pepper to taste (don't be scared to put this in, it really brings out the flavor of the cheeses). you can add in the rind of the cheeses, they will melt down. keep whisking this until all of the cheese has melted. it should be the consistency of buttermilk, very pourable, so add more milk if necessary.
grate the peccorino sardo onto a plate with the largest side of a box grater.
preheat oven to 350 degrees.
use remaining 1 teaspoon of butter to grease the inside of your casserole dish. begin layering with pasta, then crab, then peccorino sardo, then the sauce. shake the casserole dish and pound down on the counter to make sure that the sauce is making it all the way down into the pasta. complete two more layers this way, which should use all of the crab and leave just a little pasta and cheese and a lot of sauce. for the top layer do just pasta and cheese and pour on the remaining sauce. sprinkle some cayenne pepper on the top and pop into the oven for 45 minutes until browned and bubbling on the top. let cool some before serving.
notes:
i'm not lying when i say this is the best. though, i will admit that the cheeses are necessary to making these flavors work. as you can see from the above photo, i shopped for my cheese at whole foods, which has an amazing selection. if you don't have one of these near you, you can check online. the brie should be easy enough to find almost anywhere, but the brillat-savarin and peccorino sardo my require a little more detective work. these flavors are delicate enough to serve at a baby shower luncheon, but bold enough that everyone will be clamoring for the recipe.
________________
 modern spotted pup
the women of the south really knew how to take something simple and turn it into something fantastic. this recipe is a perfect example of that. at it's core it's just rice, milk, raisins, and sugar. and it would be fine with just those things. but, of course, i've taken it to a more modern place with the addition of some tasty spices and some american honey bourbon. american honey is manufactured by wild turkey and we love the stuff around here. i drink it on ice after a long day, and i try to incorporate it into meals. it's strong, but not kick-you-in-the-pants strong, because the honey it is made with smooths it out.
my understanding of the name of this dish is that the raisins against the white of the rice make it look like the coat of a hunting dog, but correct me if you have a more accurate description. any way you name it, this is good old fashioned comfort food.
 ingredients for the steeping mixture:
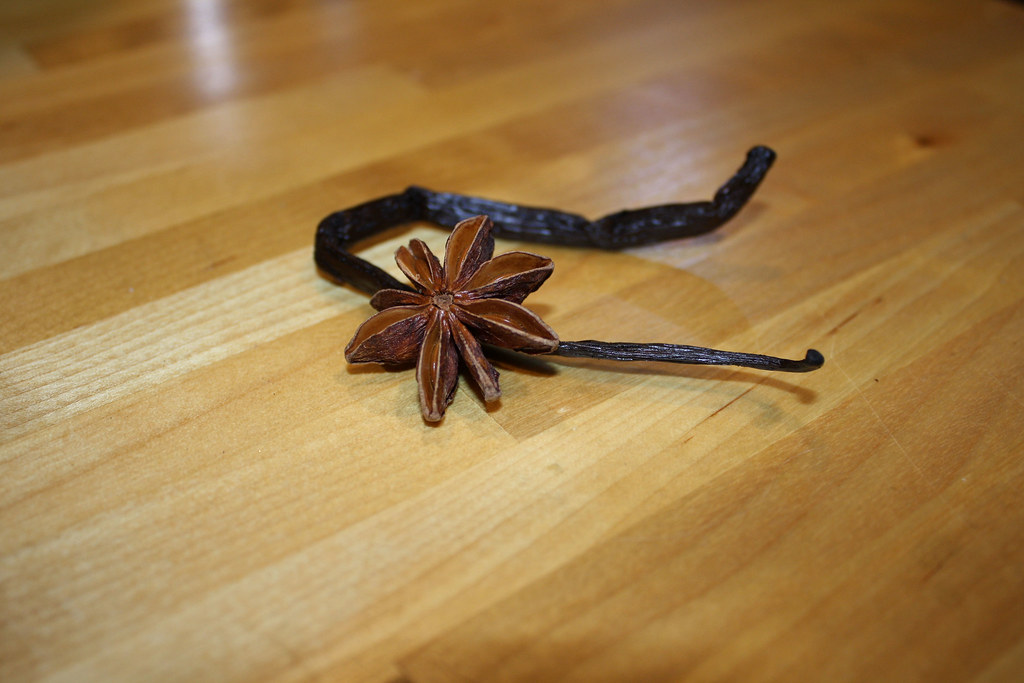
1 star anise
1 cinnamon stick
1/2 of a vanilla bean, seeds scraped from pod
1/4 pound golden raisins (if you want to use regular, you can, i just like goldens)
1/2 cup american honey
directions for steeping mixture:
in a small saucepan over medium low heat bring the star anise, cinnamon stick, vanilla bean (seeds and pod), raisins, and american honey to a gentle simmer. simmer until raisins are plumped and liquid is reduced. remove star anise, cinnamon stick, and vanilla bean pod and discard. set the raisins in the liquid aside.
 ingredients for the rice:
1.5 cups arborio rice
6 cups whole milk (plus more if needed)
1/2 vanilla bean, seeds scraped from pod
1 cinnamon stick1 star anise
1/2 cup plus one tablespoon sugar
directions:
add the rice, sugar, the milk, vanilla bean (seeds and pod), cinnamon stick, and star anise to a large heavy pot and bring to a strong simmer over medium to medium-high heat. gently stir for about 30 minutes. the rice will begin to absorb the milk and will become soft. add in extra milk if the mixture becomes too dry. taste the rice to make sure it's soft enough, and when it is, add the raisins (reserving the liquid in the other pan). mix the raisins through, and then spoon into serving dishes. drizzle the liquid over the rice pudding before serving.
notes:
this dish can be served cold (which is more traditional) or hot, which i think tastes better. the raisins become little pops of liquor in your mouth and the rice becomes so soft and sweet. it's really a nice treat on a cold winter day.
________________
 the meal was a success, and was much enjoyed by all. each of these dishes could be prepared on their own, but having them all at once was like being in my grandmother's kitchen again as a child. i hope that my family recipes entice you to try some southern cooking, whether you live in minnesota or istanbul.
the american south is known for two things, good food and hospitality. i hope my small bit of southern hospitality has made my grandmother proud today. enjoy!
 we love burgers at our house and eat them a lot. usually with fries. you can see the issue here, if we keep this up we will be really fat people!
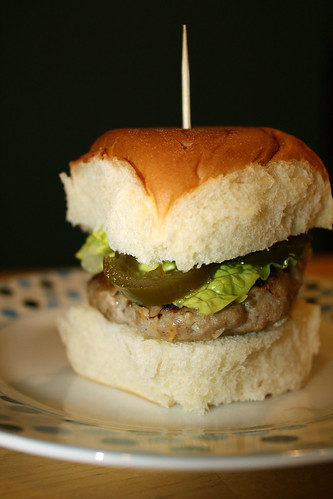
turkey burgers are the perfect way to get around this, and turkey sliders are even better...because they are tiny! adding in tons of flavor, and serving them with a large salad means that your waistline won't suffer as your taste buds get to have all the fun.
keeping turkey burgers moist isn't difficult, and really only requires the addition of a few ingredients that don't normally make their way into beef burgers. these have the added bonus of finely chopped garlic and jalapeno, making them a little bit rock and roll.
ingredients:
1/2 of a medium onion, grated into bowl
1# ground turkey
1 cup bread crumbs
1 large egg
4 cloves garlic, finely chopped
6 to 8 pickled jalapenos, finely chopped (about 1 tablespoon)
king's hawaiian mini rolls, halved
directions:
mix the egg, jalapenos, and garlic into the bowl you grated the onion into, breaking up the egg yolk. crumble the turkey in, and then add the bread crumbs. work through gently with your fingers, being careful not to over mix. if you are cooking with kids, this is a great task for them.
divide the mixture into quarters. then further divide, each quarter should yield 4 sliders. form them into patties with your hands and set aside.
meanwhile, heat a large pan or griddle over medium high heat. add the sliders when it is hot enough. cook for about 5 minutes on one side, and then flip. cook through on the other side. if you'd like you can add cheese at the point of flipping, we put sharp cheddar on ours.
serve with the king's hawaiian rolls (they are the perfect size), pickled jalapeno, and lettuce. enjoy!
notes:
these burgers are tasty, and you can control the heat by adding or removing jalapeno. kids love these things because they get to squish the meat through their fingers as they mix, and the end result is a kid-sized burger. so if you are looking for a fun recipe to make with your children, i'd suggest this one. they'll love the process and the outcome.
